| FAQ | iOS | Mac |
The Basics
iPadAdvanced
Tips and Tricks |
Importing DivesMacDive for iOS provides various ways of adding dives. Cloud SyncingOf course, you can Cloud Sync your data between MacDive for iOS and MacDive for OS X. Any dives you create on the desktop can be seamlessly synced via Dropbox. Manually adding a diveIn any Dives list (including All Dives) you can tap the More icon in the top navigation bar and select New Dive to create a new dive. If you are viewing the dives for a Tag, then that Tag will be applied to the new dive. Importing dives from other logbooksMacDive supports importing data from various file-based logbook formats. The following are currently supported:
There are more to come, however if there is a file type you'd like to use that is missing then please contact support@mac-dive.com with an example file so we can look at adding it for you! There are a couple of ways to send your files to MacDive. iTunes File SharingYou can copy supported files directly to MacDive through iTunes File Sharing.
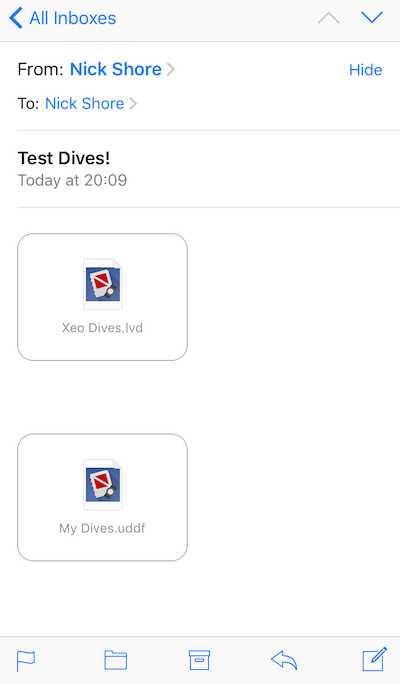
Via Email

You can also open files directly from an email. Tapping on a supported file format will let you Copy to MacDive. The file will then be available to import. iCloud DriveYou can tap the plus icon to add a device, and choose Choose a File. This lets you browse iCloud Drive for files you've synced to iCloud and add them. Drag / DropIf you are using an iPad, you can also use Multitasking and drag/drop files on to the Import window from various other sources, like iCloud Drive. Importing the file

After you have added the file to MacDive, head to the Import screen. You'll see your file(s) available for import, and tapping one will read the dives. You'll have the option to remove the file once you're done, and you can always swipe sideways on a file at any time to remove it. Adding A Dive ComputerMacDive supports a range of different Dive Computers. Some can be communicated with directly, and some require Dive Nav's DC Buddy accessory (sold separately). You can pick the models you own or want to download from and add them to My Devices to keep your list simple. Tap the + icon in the top right corner of the Import screen to select a device. Dive Computers that are communicated with directly via Bluetooth have a Bluetooth icon, and Dive Computers that require a DC Buddy have a db icon. Importing from a Dive Computer

Once you've added a Dive Computer, tapping on the device in My Devices will then initiate a download. Depending on your Dive Computer, you may also need to enable Bluetooth mode. Once a download has been completed you can tap the highlighted device to view the new dives. Downloading from multiple dive computersMacDive will remember some dive computers, for example the Shearwater Petrel 2. If you have two, then you need to add two Petrel 2's to your sources. Each will be displayed with their serial number after a successful download. This allows MacDive to "remember" a device, both to ensure you contact the right one and also to optimise battery usage. Importing via Dive Nav DC Buddy

Importing via DC Buddy works in much the same way, once you've added a source.
As in the screenshot above, MacDive will also show an icon to indicate when your DC Buddy battery is running low, or nearly empty. DC Buddy Error -5This error is commonly reported due to a timeout. The simple fix is to give things a minute and try again. However, in some cases it can also be due to something more sinister. In general we recommend trying a few times, and ensuring you don't have a low battery. If issues persist, then by all means get in touch with support@mac-dive.com. Removing Dive Computer SourcesYou can swipe sideways on a dive computer to Forget it, if you'd like to remove it from your list of devices. |